How To Replace Wheel Seals

It’s critical to lube the bearing before installation. The hub should be carefully mounted on the axle to avoid damage to the new seal.

At the current rate of improvement in wheel-end systems, it won’t be long before wheel seals are among the most durable parts of a truck, offering longevity comparable to that of Huck bolts and ashtrays.

A scant five years ago, seal manufacturers were rightly proud that they’d doubled the life expectancy of their products, moving the average from roughly 150,000 miles in the 1970s to nearly 300,000 miles. But nobody’s bragging about that lofty achievement these days. Now the goal – heck, the norm – for better quality seals is 400,000 miles or more. The source of this ever-upward spiral? To quote an old slogan from industrial giant DuPont: “Better things for better living through chemistry.”

Today’s seal materials, with trade names like Viton and Vamac, could easily be confused with brands of anabolic steroids or perhaps the characters of a Star Wars episode. Actually, they’re the latest in a string of exotic substances designed to ignore the high temperature at the end of a working axle.

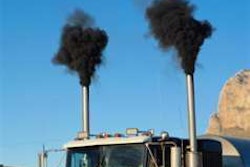
“Heat’s the enemy of wheel seals, especially those made from standard nitrile rubber,” says John Butler, senior field engineer for Federal Mogul. “At 250 degrees, they crack, break the static band and leave.”

Under normal operating conditions, clean lubricant will keep internal heat levels from rising too high. The real danger is during the first few miles of a trip, before the lube warms and starts flowing freely enough to coat the seal’s lip. This problem is especially common in non-drive hubs filled with semi-fluid grease, an increasingly popular product.

“During a dry start-up, the temperature on a seal lip can easily spike well above 175 degrees,” says Leslie Kern, senior heavy-duty product manager for Chicago Rawhide. “Seals must be built to withstand this sort of continuous abuse.” To do that, manufacturers are constantly looking for new and more durable plastic and rubber compounds. Much of the latest crop comes in the form of HNBR (hydrogenated nitrile) or polyacrylate.

Partner Insights
Information to advance your business from industry suppliers

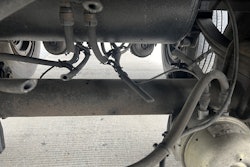
Despite the wizardry of chemists, however, things still occasionally go wrong, and seals fail prematurely. Alan Dick, a product manager at Stemco, contends that the single biggest cause of such trouble is incorrect installation. Too often, he says, mechanics – both professional and backyard – will attempt the job without proper tools (seal drivers), resulting in components that are damaged or mounted slightly cockeyed. Other contributors to seal failure include incorrect bearing tension, faulty bearings or cups; inadequate, contaminated or non-compatible lubricant; or excessive brake heat.

Below are the steps for replacing an oil-bath wheel seal on a Class 8 vehicle axle. More product-specific information is available from each manufacturer. One extremely helpful guide is a Chicago Rawhide publication, Wheel End Systems. Service shop time for these jobs is typically rated at just less than two hours.

THE FIX

  1. REMOVE WHEEL AND DRUM. Secure the truck with wheel chocks on a flat surface. Raise the wheel end off the floor and brace the axle with a heavy-duty jack stand. Release the brakes and back off the slack adjuster. Do not use an impact wrench for this task. ArvinMeritor adjusters have a locking pawl device that must be pried out or removed before they can be backed off. Unbolt and remove the wheel. Use a large hammer to loosen the corroded bond between the drum and hub, then slide the drum off the brake shoes and place it on the floor, wide side down.

  • ACCESS HUB. Place a drain pan under the wheel end. For a drive axle, loosen the axle-flange nuts until they’re flush with the bolt ends to temporarily protect the threads from hammer damage. Repeatedly strike the center of the flange with a sledgehammer until the flange separates from the hub. Remove the nuts and slide the axle out of the hub. Most flanges nowadays are secured with nuts and standard lock washers. Some, though, have conical (or cone-like) washers designed to help position the flange. This latter type usually requires much more effort to remove. None of this violence is necessary for non-drive wheels. With them, you simply remove the hubcap bolts, then gently tap the cap free.
  • REMOVE HUB. Some hubs are attached with two large nuts (adjusting and jam) and at least one locking ring. Others have a single nut and cotter pin. Some newer hubs are secured with a unitized device. The removal of any of these requires one or two large 3/4-inch drive sockets, which can be found at a good parts store for as little as $30. Never use a hammer and chisel to loosen or tighten wheel-end nuts. This slipshod approach is unsafe and potentially expensive. Once the fasteners are off, slide the hub out until the outer bearing is near the end of the spindle. Put the bearing aside, then remove the hub and place it in the brake drum, threading the wheel bolts into their holes.
  • REMOVE SEAL AND INNER BEARING. Use a medium to large “crow’s foot” pry bar to dislodge the seal. Remove the inner bearing. With some seals, you’ll need to remove a wear sleeve from the axle shoulder. Standard (flat) wear sleeves will expand if struck with a hammer. Others, featuring contaminant guards, can be driven off with a sturdy punch or drift. Never chisel the sleeves because you could accidentally mar the surface below them.
  • CLEAN AND INSPECT PARTS. Soak the hub, bearings and attaching hardware in cleaning solvent. Rinse the parts with fresh solvent and dry with compressed air and unsoiled towels. Never spin a good bearing with high-pressure air. Thoroughly clean any other parts that might have been soaked with leaking lubricant. Inspect the axle shoulder for grooves, nicks or other damage. Also check the bearings and cups, and replace them if they show signs of spalling, pitting, overheating or wear.
  • PREPARE SHOULDER. Use strips of emery cloth to polish out any rough spots on the axle shoulder or hub bore. Small imperfections can be filled with No. 1 hardening Permatex or liquid metal. When these repairs are dry, smooth them with emery cloth. Gouges that encircle the shoulder should be covered with a repair sleeve or a combination seal/wear-sleeve. If a sleeve is necessary, coat the shoulder with a non-hardening silicone sealant, then drive the sleeve into position – flush with the shoulder’s outer surface – with a large hammer and appropriate sleeve tool (available from the seal maker). Remove excess sealant.
  • INSTALL SEAL. Place the hub (wheel-bolts down) on the brake drum, threading the bolts through their holes. Inspect the new seal to ensure that it’s not flawed. Drench the inner bearing with clean lubricant, the type being used in the wheel end. Place the bearing in its cup. Wipe the seal bore with a clean towel. The seal should be marked to indicate which side faces the bearing. Position the seal over the bearing and poke the end of an appropriate driver (available from the seal maker) through both. Squarely hammer the seal into the bore until you notice a change in the sound of the pounding.
  • MOUNT HUB AND TORQUE BEARING. Lubricate the outer bearing and lay it and the fastening hardware on a clean towel. Carefully slide the hub onto the axle spindle until it bottoms out on the shoulder. Be sure the hub goes on straight. If it binds, remove it and inspect the seal for damage. Holding the hub with one hand, quickly install the outer bearing and spin on the large adjusting nut, tightening it according to the specification for that particular wheel end. Manufacturers typically recommend a torque wrench and dial indicator to properly set the bearing tension. Most mechanics, though, rely solely on a torque spec. When working on a traditional heavy-duty axle with a double-nut fastening system, they’ll crank down the adjusting nut to 200 pounds-feet while constantly turning the hub. Then they will back off the nut a full turn and retighten to 50 pounds-feet, again while turning the hub. The adjusting nut is then backed off the nut 1/16 to 1/4 turn to accommodate the locking ring or cotter pin. The outer, or “jam” nut is torqued to 250 pounds-feet to 350 pounds-feet, depending on the style of locking hardware. Fill the hub cavity with lube.
  • COVER HUB AND TOP OFF LUBRICANT. Clean the mating surfaces of the hubcap or axle flange. Apply a new gasket or coat of sealant – never both – and install and tighten this final part. Avoid overtightening the small bolts on hubcaps. Non-driving hubs should be slowly spun while lube is pumped through the vent-hole plug. With a drive hub, raise the opposite end of the axle 6 to 10 inches, then wait until lubricant has had ample time to migrate from the differential to the wheel end. Refill the differential as needed.
  • MOUNT WHEEL AND ADJUST BRAKES. Reinstall the wheel and properly torque the lug nuts. Manually tighten the slack adjuster, and check its movement when an assistant applies air pressure. Drive 5 to 10 miles to make sure the hub isn’t leaking or overheating.

  • TOOLBOX
    3/4-inch socket set
    1/2-inch socket set
    Torque wrench
    Hub sockets
    Seal driver
    Combination wrenches
    Assorted screwdrivers
    Assorted pliers
    Sledgehammer
    Jack stands
    Ball peen hammer
    Crow’s foot pry bar
    Cleaning brushes
    Emery cloth
    Shop towels
    Cleaning solvent
    Silicone sealant
    Lubricant


    FOR MORE INFO
    Chicago-Rawhide
    (800) 882-0008

    Dana
    (800) 826-4357

    Federal-Mogul
    (248) 354-7700

    National SKF Automotive
    (888) 753-2000

    Stemco
    (800) 527-8492

    Triseal
    (800) 910-7325

    The Business Manual for Owner-Operators
    Overdrive editors and ATBS present the industry’s best manual for prospective and committed owner-operators. You’ll find exceptional depth on many issues in the 2022 edition of Partners in Business.
    Download
    Partners in Business Issue Cover