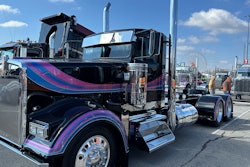
Position the coil rack in the trailer’s center, indicated by the welded line on the rub rail.
For flatbed securement, coils are “a different beast,” says Mike Layden, a supervisor at Nucor Steel in Tuscaloosa, Ala. The task is complex enough that the Federal Motor Carrier Safety Administration’s Drivers Handbook on Cargo Securement, available in print and online (fmcsa.dot.gov, search “cargo securement”), devotes an entire chapter to coils.
Generally, the sum of the chains’ working load limits must equal at least half the cargo weight. For both suicide-loaded (eyes to the side) and shotgun-loaded (eyes lengthwise) coils, on-bed bracing serves as another anchor.
Mike Watkins, a 30-year trucking veteran leased to James R. Smith Trucking of Cullman, Ala., uses at least one chain more than the minimum number required. He used five 6,600-lb. chains and a coil rack as he walked through the process of securing a 40,000-lb. coil at Nucor.
Position the coil rack in the trailer’s center, indicated by the welded line on the rub rail. Watkins has placed mats of half-inch rubber at the rack’s top position to protect the four-by-fours beneath and brace the coil an inch above the bed, minimizing its chances of rolling.
Direct the forklift operator to the proper position above the rack. If the coil’s width is less than that of the trailer, you might guide the coil down an inch or two left of center, Watkins says, to counterbalance the slight right-to-left lateral downgrade from the center line of most roadways.
After hooking the chains to evenly spaced anchor points along one side, toss them through the coil. Arrange the chains on the opposite side, being careful that they don’t cross one another, a forbidden practice for suicide-loaded coils. Secure the hooks to anchor points mirroring their position across the trailer, and pull out as much slack as you can.
Fully tighten each chain with a binder, alternating from front to back until reaching the center. If your binder is non-ratcheting, use an extender bar to “get one more link,” Watkins says. Tighten until fully tensioned, being careful not to overtighten ratchet binders. Listen carefully for sounds indicating a link on the verge of breaking.
TOOLBOX:
- Hardhat, goggles, work gloves, steel-toed boots.
- Chains: 5/16- to 3/8-inch links, 16 to 25 feet, as many as necessary.
- One binder for each chain.
- Binder extender bar.
- Bracing rack made of 4×4 oak or other hardwood.

