Tips on quick light replacement for that moment inspection (or an inspector) shows you a bulb or LED has gone dark.
No truck driver likes being pulled over and hassled because a light that was working only this morning has now faded to black.
Lights on a truck are needed for safety, but they can be unpredictable. Fortunately, the folks who make the trucks and trailers and the lights that go on them have worked long and hard to come up with better and better technology.
Troubleshooting
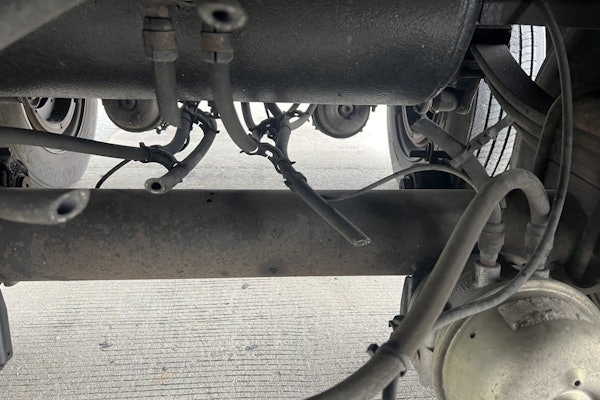
Two basic kinds of failures can make a light go out. An open circuit typically means a broken wire or a poor connection. A common cause is corrosion that has oxidized the metal connectors leading to the lamp. The corrosion also may show up where a ground wire is fastened to the frame. You’ll see visible deterioration – discolored metal. The corrosion turns the metal into something that can’t carry current and needs to be cleaned up with sandpaper or some other abrasive. If the female or male plug is deteriorated enough, it will have to be replaced. An open circuit also can occur if a wire has been subjected to vibration or twisting and the conductor inside the insulation has broken apart. Short circuits often happen when a wire rubs something and the insulation frays. The current, on its way to a lamp, is given an opportunity to pass directly from the wire to the truck or trailer frame and thus directly back to the battery and generator without a lamp to use up the power.
This also is called a “ground.” The result of a short circuit is abnormally high current and a blown fuse or tripped circuit breaker.
Chuck Cole, manager of technical sales and product training at Utility Trailer, says female plugs carry the voltage to the lamp’s male connector from the generator. This is done so that, if the connector comes apart, the metal conductor, which is inside a female plug, won’t be able to contact the truck or trailer’s metal frame.
Cole suggests that, when a light goes out, the smart first step is to inspect the connector. You may find that it is disconnected. Even if connected, unplug it and inspect it to see if there is corrosion.

Clean up the connector if slightly corroded (Page Large, national fleet sales manager for Grote Industries, says you’ll see “green stuff”), using sandpaper or a similar abrasive. In many cases, the connector will be ruined. In this case, Large says, “You’ll have to cut the pigtail and splice in a new connector.” It may be feasible to just replace the entire lamp, which may cost as little as $4. If splicing in a new connector, use a quality design that allows you to first splice the two wires together and then heat a shrink-wrapped plastic sleeve over the splice to seal things up.
Where the connection is soldered, Cole suggests soldering the replacement connection when you have time to restore full reliability.
When reconnecting, even if being disconnected was the only problem, put a dielectric grease into the female connector to protect both sides from corrosion.
Many of the latest trailer wiring harnesses, including those from Utility, have both supply and ground wires in the harness – one plug provides both the connections. Earlier trailers use the trailer chassis as a ground, and on those there will be a separate ground wire.
Large says a smart first step when you suspect it’s just a lamp out is to evaluate the situation based on whether it’s an LED or an incandescent lamp. “If it’s an LED, start with the connection,” he says. “Since there is no filament to break and the life expectancy is so long, the higher probability is that the problem is in the harness or wiring.”
Otherwise, just as Cole suggests, start with the connection. If it’s not corroded, test the lamp with an external source of power. You need a gadget Large calls a “battery type tester” that supplies its own power, taking away the possibility of a poor connection anywhere else in the system. Just disconnect the lamp and connect the tester between the lamp’s two terminals.
If the lamp is good, the next step is to check for voltage coming from the wiring harness. Both experts insist that you use a test lamp that will light up with voltage, but strictly avoid one designed to probe the insulation. Large describes this as “an ice pick that we call a murder weapon.” A tiny hole in the insulation can easily cause moisture to be drawn in and be “wicked” into the harness, just as a candle wick draws wax up into the flame. This can send corrosive moisture with road salting chemicals in through large areas of the trailer’s (or tractor’s) wiring harness. Large suggests that if you find such a hole, you should immediately install a heat-shrink sleeve over it to seal off the leak to minimize damage.
When troubleshooting, use a test lamp or voltmeter that indicates voltage, but confine your checks to connector pins, even though- as Large freely admits – “this can make troubleshooting more difficult.” Make sure to turn the circuit on first, then check for voltage at each connector in the harness, heading back toward the tractor-trailer connection.
Lamp replacement
Replacing stop/tail/turn lamps or marker lights on trailers these days often involves replacing the entire lamp assembly, rather than just a bulb. Some simply pull out of a rubber grommet and unplug, allowing simple replacement by just reversing the two steps.
Large says some lamps may have a tube flange made of another more solid material that simply pulls out and reinstalls, allowing lamp replacement. Where the lens comes right off and the bulb alone is replaced, Cole says it may either snap into a snug connector or have a “bayonet-style” connector where you depress the bulb, turn it a little to the left to unlock it, then pull it out. To install, you force the first type in until it snaps or, with a bayonet connector, force the lamp in gently as far as it will go, rotate it to the right and release it.
Cole suggests you carry a battery-powered drill for light troubles, for two reasons. First, many metal flanges are attached with screws to hold them in place. Though the latest Utility trailers (and some others) use stainless steel screws, they still may eventually rust and prove impossible to remove. Standard screws will be even more likely to corrode.
Second, many early LEDs were so expensive that trailer makers began riveting them in place so they would be hard to steal. With either frozen screws or rivets, you’ll have to drill out the fastener with a drill that is slightly smaller than the hole’s diameter. Large says the replacement lamp will come with machine screws that will cut themselves nice threads and go right back into the drilled holes.
A burned-out headlamp, or one obviously broken by a rock, on a relatively new tractor is a much easier candidate for replacement than trailer lighting. Lonnie Boutin, performance PM manager, and Kent Gideon, service director, both of International Trucks of Houston, gave some advice on doing this job on International tractors.
The work is done after opening the hood for access to the area behind the headlight. “Newer models like the 4200-4400 and ProStar from 2004-2008 use a bulb,” Boutin says. “While the exact design varies slightly, all you do is disconnect the wiring at the connector and remove it. You turn it a quarter turn to unlock it prior to pulling it out. Then insert the new bulb, rotate it to lock it and reconnect the connector.”
Replacing the sealed beam often is required on earlier models. First remove four attaching screws, then remove the bezel or outer ring that holds the lamp in place. Pull the lamp out of the mounting and pull the spade-type connector off the back. Coat the connector on the new lamp with dielectric grease to protect the terminals from corrosion. Finally, put the bezel back in position and install the four screws, tightening until just snug.
LED taillights are optional on ProStar Class 8s and are standard on Premium Eagle and Eagle Limited Editions. They are mounted in a rubber grommet, and the light can simply be pulled out and disconnected. Earlier taillights may have either a mounting ring retained by screws or a cap that simply snaps in and out. Here again, make sure to pull the latch tab away from the connector before trying to pull it off. Always coat connections with dielectric grease before reconnecting.
George Benz, manager service diagnostics and new vehicle development at Daimler Trucks North America, reports that the Freightliner Cascadia uses halogen headlight bulbs rated at 1,200 hours of service life. To change the bulb, first tilt the hood, remove the rear plastic shield and disconnect the wiring – the bulb comes out with a quarter turn counterclockwise.
He says the forward turn signal and park lamp/DRL combination bulb housed in the Cascadia’s headlamp is the GE 3457 incandescent bulb. The turn signal is a 3,000-hour bulb, and the park is 10,000 hours. Bulb replacement for the forward turn signal is the same as the headlamp bulb, with a quarter turn.
Incandescent taillamps are standard on the Cascadia and use the same housing as used on the Freightliner Century Class, Columbia and FLD. These lamps are protected by FET (Field Effect Transistor) circuit protection for long life. The incandescent lamps have four fasteners that attach the lens to the housing. Once that is removed, the bulb is replaced by twisting it to the left and replacing in reverse order. Many Cascadias have the optional LED tail lamp. The procedure for these varies with the supplier.
For more information:
Utility Trailer Manufacturing Co.
www.utilitytrailer.com
(626) 965-1541
International Truck and Engine Corp.
www.internationaldelivers.com
(800) 448-7825
Daimler Trucks North America
www.daimler-trucksnorthamerica.com
(503) 745-8000
Grote Industries
grote.com/America/
(812) 273-1296
International Trucks of Houston
www.internationaltrucksofhouston.com/
(713) 364-3444