Replacing a damaged fuel tank is a simple, do-it-yourself job.
Road detritus can take a toll on your fuel tank. We’ve all seen a truck that looked good but for a dent in one end of a tank. Fuel tanks may also, on rare occasions, develop a leak at a seam or threaded fitting and need to be replaced, or might even need to be removed for internal cleaning if contaminated.
Fortunately, this is one part of the truck that, with careful handling and the help of a friend or two, should be easy to remove and replace.
Fuel tanks today are most often made of polished aluminum, a lightweight material that makes them easier to handle than the steel tanks of bygone days. Most are literally strapped in place with wide, flexible steel straps that surround the tank about 3/4 of the way. A rubber belt is placed between the tank and strap to keep the strap from scratching the metal. The belt also absorbs vibrations that could cause the strap to rub through the tank or cause noise.
Steve Kuhn, manager of serviceability design for heavy and severe service vehicles at International, advises spec’ing an aluminum tank where there is a choice. He believes it may even be worth it to replace a steel tank with aluminum. A steel tank will eventually rust on the inside, wreaking havoc on fuel filters and the rest of the fuel system.
When replacing a fuel tank, remember that while diesel fuel has a high flash point, more than 130 degrees F, a significant spill is still dangerous – both for your personal safety and the environment. Carefully handle the large quantity of fuel in the tank and cap off fuel lines or carefully drain them into a safe container. Be careful throughout the work to prevent fuel spillage. If a spill or leak develops, stop it as soon as you can and clean up before it permanently contaminates the environment or finds an ignition source.
You will normally need only basic hand tools to do the mechanical work related to this job. However, it is important that you have a safe way to collect the fuel. Scott Elders, service manager at Michigan Kenworth in Grand Rapids and a member of the 2007 Kenworth Service Council, says his dealer’s technicians use a holding tank that rolls around on the shop floor. An enclosed tank is necessary for safety – collecting fuel in open buckets invites accidental spillage.

You’ll also need a safe electric or hand-powered pump with a long hose that can reach to the bottom of the tank. While the fuel lines can be drained, one of the biggest problems with this kind of work is losing the prime in the fuel system. While it might be possible to refill fuel lines with a small funnel, the best practice is to cap them off right when you disconnect them.
Paul Orsulak, an instructor at the North American Institute of Mack and Volvo in Allentown, Pa., says the No. 6 and No. 4 Aeroquip fuel lines on Mack tractors can be capped off with special plastic caps designed specifically to fit them. These are available at dealers.
Consult your dealer and get the necessary number of caps (typically two – one for the supply line and one for the return) before starting work. Also, inspect the strap attaching pins, which often use cotter pins for retention. If so, get new cotter pins from your dealer or other parts outlet. They should not be re-used. Also, get some sealer approved for use with fuel for the threaded fittings.
It would be smart to get any O-rings used at fuel connections and the rubber protectors that are fitted under the straps.
Tanks normally have a large, round opening for the fuel gauge sending unit on one side and a blank cap on the other. Get a new gasket for this part. You may also need a Torx screwdriver to remove and replace the attaching screws.
The illustrations show the tank and mounts on a 2007 Mack Pinnacle tractor. Other trucks may have slightly different mounting systems, and many may have elaborate aerodynamic fairings around the tanks. For example, the Kenworth T2000 has fairings that entirely surround the fuel tank. Study the mounting systems of anything that is in the way prior to getting down to work. Most fairings are designed to be removed easily for maintenance.
- Assuming the truck can be operated safely, Elders says you must first minimize the amount of fuel in the tank. Use the truck until the tank gauge indicates the tank is nearly empty.
- Park the truck in a well-ventilated area and make sure all electrical devices and other potential ignition sources (torches, automobiles with catalytic converters, battery chargers with their DC connections) are turned off or removed. Smoking while doing the job is taboo in case of a fuel spill.
- Remove any fairings or similar parts that may be in the way. They are normally attached to brackets with bolts that are accessible from behind the fairing and bracket system. Carefully note the position of each fairing part, making a drawing if necessary. Keep all their fastener parts in a container.
- On the Pinnacle, the only parts in front of the tank are steps attached to the straps (A). However, since the steps on the Mack are also attached to the back of the front wheel wells for extra bracing, remove the upper and lower step attaching bolts from the bracket, collecting any washers with the bolts and storing both in a safe place.
- Remove the fuel tank filler cap and place it upside down in a clean and safe area.
- Make sure the intake hose of your pump is clean by wiping it with a clean rag. Then insert the hose into the tank and force it down to the bottom. Operate the pump until the tank is fully drained. This will minimize the weight during handling. If the fuel shows any sign of contamination, get an equivalent amount of clean fuel in a portable tank so you can refill the new tank after installation.
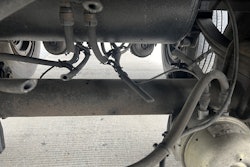
- Disconnect all electrical and fuel lines. If this tank has the fuel gauge sending unit in it, disconnect the electrical connector at the sending unit (B). Typically, connectors are held together with a locking tab that needs to be pried outward. Tape or tie the connection out of the way to prevent damage during remaining work.
- If the tank has a vent line, it can be simply pulled off the connection at the top or side of the tank (C). Tie it or tape it out of the way to keep dirt out of the hose.
- Have the fuel line caps ready. Note the positions of the supply and return fuel lines so you can easily reconnect them. Unscrew the fuel line connections with a wrench and immediately cap them off.
- Since the tank has a cylindrical shape, it can be turned to any angle on its mounts during installation. Mark the highest point of the tank with chalk or a marker so you can install it or a replacement at the same angle. This ensures accessibility of the cap and proper routing of fuel and vent lines and the gauge connection.
- Support the tank while disconnecting the straps. The Mack tank is mounted against semicircular supporting brackets that cooperate with the straps to steady it against the frame. The best procedure would be to have a helper to hold the tank at each end, but if the tank is held against the brackets and the frame on a setup like Mack uses, you may be able to use a floor jack. If you plan to reuse the tank, place a rag or wooden block between the floor jack and the bottom of the tank. Place the floor jack slightly out from the center of the tank so it will be held against the brackets.
- The straps are attached to frame brackets via pins locked in place with cotter pins. The pins have heads on one side and cotter pins on the other. Use a pair of pliers to straighten out the ends of each of the cotter pins and flatten them (D). Note which direction the mounting pins slide into the mounts. Make a drawing, if necessary. Then use the pliers to grasp the round head of each of the cotter pins and pull them out. Discard the used cotter pins. Now use a flat object against the end of the remaining pins and a few gentle hammer taps to begin forcing them out of the brackets from the side where the cotter pin was. Once started, pull the pin out using a pair of pliers to grip the head. If the truck uses screw type connectors, unscrew the connector to disconnect.
- Roll the strap and rubber protector out of the way. Repeat the process for both straps.
- Grab the tank at either end and remove it.
- Inspect the rubber protectors. If cracked or worn, replace them. Kuhn recommends replacement every time, as both wear out with time.
- If the tank is being replaced rather than being repaired or cleaned, it will be necessary to transfer any hardware not supplied on the new tank. Unscrew each vent or fuel line fitting that is still in the tank and move it over to the new tank, as necessary. Use a sealer suitable for fuel on the threads of each fitting. Apply a minimal amount in order to keep the sealer out of the tank. Thread the fitting into the tank threads as straight as possible, turning gently. If a fitting suddenly won’t turn, it is probably being cross-threaded. Remove it, change the angle, and thread it in again. If the threads are lined up properly, it will turn in easily for at least a few turns before getting tight. If any threads were damaged during installation, they would have to be repaired before using the tank, as the fitting would leak.
- Note the exact orientation of the sending unit as you remove it because the float mechanism has to face in the right direction. Unscrew the screws attaching the fuel tank sending unit or blank cap for the sending unit hole. Remove the cap or sending unit, install the new gasket, and install the sending unit on the new tank facing in the same direction, or install the blank cap in any position. Install and gently and evenly tighten the screws.
- Position the rubber tank protectors inside the straps. The protectors are long, flat strips that end up wrapped around the tank inside the straps. They are almost long enough to reach all the way around the tank, but the gap needs to end up just below the upper attaching pin, where the tank does not need protection. Lay the protectors on the straps so they will end up in the right position. Make sure the protectors are positioned evenly so their edges will hold them in place on the straps and won’t get pinned between the tank and the straps.
- If replacing the tank, orient the two tanks similarly and then mark the highest point on the new tank. Turn the tank so the fuel fittings will be facing the frame, and then put it in position on the mounts. Turn it so the high-point mark is at the very top. Have helpers hold it there or support it securely during the next step.
- Run the straps and protectors around the tank and over the top. Line up the hole in the end of each strap with the hole in its mount and reinsert the pin in the same direction that it faced before. It may be necessary to raise or lower the tank to do this. Once the holes are all lined up, insert the mounting pin all the way through the holes in the mount and strap, making sure the pin is fully inserted and the heads of the pins rest flat against the outer edge of the mounts. Where screw type connectors are used, carefully start the threads to avoid cross threading and then snug up the connector. Best policy, according to Kuhn, is to torque to spec so the tank won’t turn around on its mounts. The tank’s supporting system may now be removed, or your helpers can let go of the tank.
- Install the new cotter pins through the holes in the ends of the pins and use a screwdriver to bend both ends of each cotter pin outward to a sharp angle. Some trucks use screw connections.
- Fuel connections commonly have O-rings inside. Kuhn recommends that you replace them. If they leak, you could get air in the fuel system, which has a big effect on performance. Hold the fuel lines in position near their connections on the tank, remove the caps and then screw the fuel line connections into place. Tighten each with a wrench until just snug. To minimize the chance of losing the fuel system’s prime, refill the tank to just above the level of the fuel lines as soon as possible.
- Reconnect the vent line as before. If this tank has the sending unit in it, orient the two halves of the connector so the locking tab parts are on the same side. Then slide the female connector inside the male end, inserting it until the locking tab snaps into place.
- Reconnect any ties that may have been removed prior to tank removal. Replace the filler cap. Check for any leaks and further tighten or repair fittings as necessary. Start the engine. If it falters, the fuel system may have lost its prime. Most fuel systems are equipped with a priming pump you can operate manually to expel air from the system and bring in fresh fuel. Consult your owner’s manual for operating instructions, if necessary.
- Replace any fairings and attaching bolts for steps related to the tank installation, and the job is done.
With that new fuel tank aboard, your truck will look like it should, and you won’t have to worry about leaks in that part of the fuel system.
Routine Maintenance
A good fuel/water separator is your best defense against water or sediment in the fuel getting into the injection system. Maintain the separator as the manufacturer recommends, draining it and replacing filters regularly. Also, buy fuel at reputable outlets that regularly pump sediment and water out of their tanks.
Keep the fuel tank cap and the area around it clean by wiping it down regularly with a clean rag. It’s best to refuel at the end of the day, especially in cold weather, to minimize condensation.
Occasionally, remove the fuel tank cap and peer down into the tank, using a flashlight if necessary, to check for indications of sediment or water – you may want to drain the tank. Some manufacturers recommend draining periodically, for example at 30,000 miles. Consult the maintenance manual supplied with the vehicle.
Some tanks have drain valves that are simply turned to open and returned to the closed position once the process is completed, making the job easier to perform. If the tank has a drain plug, it’s best to drain when the tank is almost empty to make it easier to reinsert the plug.
Make sure you use a container that will hold several gallons of liquid and that is safe for fuel, such as a large metal pan. Remove the plug or open the valve and allow the fuel to drain until it runs clear. Then replace and snug up the plug or close the valve tightly. Take the contaminated fuel to a proper disposal site.
At least once a year, inspect all the tank mountings and brackets and tighten any loose bolts. Inspect the tank and lines for signs of leakage. Make repairs as necessary. Check the routing of all hoses and lines and make sure they are not chafing against the frame or other parts, or touching shafts or hot exhaust system parts. Inspect any ties and replace if cracked or worn. Replace hoses and vent tubes or the fuel sending unit wiring if its insulation has been damaged.
For more information:
Michigan Kenworth
www.michkenworth.com
(800) 306-0200
North American Institute of Mack and Volvo
www.n-a-institute.com/nai/
(610) 709-2583 (Mack)
(336) 393-2437 (Volvo)
International Truck and Engine Corp.
www.internationaldelivers.com
(800) 448-7825