Hiring a professional for spot painting is worth every penny.
Sticks and stones may not break your bones, but they do put paint chips in your grille, front fenders and side fairings. Refinishing so the paint looks original is a difficult and demanding job.
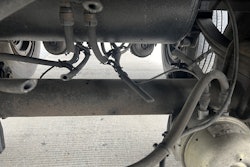
We visited Best Used Trucks in Bethel, Pa., where Eric Longacre repainted the grille area, parts of the front fenders and a side fairing on a Kenworth T600. In this case, most of the truck’s finish was in acceptable condition, but stones or other objects thrown up from the road had caused some obvious nicks, down to the factory primer. Filling in the nicked areas around the grille and right side fairing and repainting them would make the truck look almost like new.
Longacre is a professional often hired by Best to do this kind of job. He believes the finished product won’t look right unless someone with training, experience and the right equipment performs the work. On a truck in decent condition worth $20,000-$40,000 or even more, an investment of $200-$300 could bring back much more in increased resale value.
A small fleet with three trucks or more might find it worthwhile to get the equipment and training to do such work. You’ll need a small air compressor and tank, a spray gun, radiant drying equipment and small air dryers, and a large stock of paint blends and solvents.
Also, you’ll need ideal conditions for effective painting. The first requirement is that the temperature be above 50 degrees Fahrenheit, Longacre says. Sunshine helps and may allow you to paint at a slightly lower temperature. But if the conditions are too cold, the paint will neither spray nor dry properly and will end up looking uneven. Longacre has a light rig with 10 250-watt incandescent lamps to help speed the process on days when the temperature is on the borderline.
Compressed air under about 90 psi is used to atomize the paint and carry it onto the surface, one of the reasons temperature is critical. The air expands and cools in the spray gun, exposing the drops of paint in the gun to lower-than-outside temperatures on chilly days. If the weather is too cold, says Longacre, “You’re going to feel like you’re trying to paint an ice cube. Nothing will stick the way it should.”

Naturally, unless working under shelter, it’s necessary to make sure the forecast is for clear weather for at least 6-10 hours after the job will be completed.
Also, make sure not to get a truck detailed just before painting because silicone wax causes major problems. Primer, paint and clear coat will all refuse to stick to the surface.
Doing the job
- Thoroughly clean the areas to be painted.
- It’s necessary to mask nearby areas (A). Using brown paper and masking tape, cut the paper to the shapes of the areas to be covered, and apply them with the tape so paint will be kept completely off grilles, headlight surrounds, and any chrome or aluminum parts. Even slightly overspraying onto such parts is a dead giveaway that repainting has been done. The idea is to make it look as if the truck is almost in showroom condition.
Also, if fixing nicks just below a headlight bezel, or similar area, it’s necessary to make sure the paper covers well above the bezel itself. In this case, the critical issue was protecting the bumper, grille and nearby areas from overspray (B). If any overspray gets onto a flat area like the hood, Longacre says it may be necessary to repaint most of it to make sure the repainted areas blend with the others.
If in performing the other preparatory steps your paper is damaged even slightly, be sure to patch up any holes carefully with more paper and tape.
- Mix body putty with its hardener in the proper proportions and then apply it carefully with a razor blade to fill all the dents in the paint. You’ll have to use the razor blade skillfully to fill the hole and flatten the putty around it (C). You’ll sand the putty patch flat during step 5.
- If the body putty is slow to dry, you can hit it with a heat lamp (D).
- Once all the holes are filled, it’s necessary to sand all the areas with dampened sandpaper in order to roughen up the surface. This is key to getting the coats of primer, paint and clear coat to stick and making repair patches flush with the surface so they will disappear once the area’s repainted (E).
- Shake the can thoroughly and then apply primer to a large area around each patch. Longacre used a gray primer made by Akzo Noble. Primer “fills in imperfections and also stops rust that could otherwise get under the new paint and ultimately cause it to loosen and come off,” he says. It needs to be sprayed on steadily, while shifting the can back and forth to produce repeated coats, until all the original color is blocked out.
- Once all the primer has been applied and has dried, re-sand with wet sandpaper to roughen up the layer of primer (F).
- Longacre needed to repaint an entire side fairing to fix some deteriorated areas. He used a power sander to roughen up both the primered and other areas here. (He knew he would need to repaint the entire panel to make it look uniform.) Note the careful masking of the chrome attaching bolts and large washers (G).
- Once the priming has been done and the surface roughened, go over it with a damp cloth to remove any sandpaper grit, ground-up primer and original paint (H).
- While with cars you can normally buy the right paint pre-blended, “With trucks, blending to match is the largest problem and it can be frustrating,” says Longacre. The match becomes especially critical when painting a large area. Longacre works with a company called Sikkens that supplies paint in a wide variety of colors as well as software that gives him blending information via his laptop. He works with a local distributor so that technical advice and supplies are available, too. If you decide to do this kind of work on your truck or trucks, don’t go it alone. See it as a long-term learning process based on a relationship with a supplier. You’ve got to blend several different basic colors in a specific proportion according to a formula. Longacre has a sensitive scale in his van to precisely measure the colors in proper proportion. The ideal way to do this is to get the color, year and model of the truck and get a match with the factory color via a specific blending formula that the paint maker has developed. Unfortunately, the right paint information was not available for this Kenworth.
The first step in getting a match yourself is to look up the color in a loose-leaf book of shades suppliers give to users (I). Once you find a page with colors close to the paint that’s on the truck, you can pull the page out and place it directly on the truck finish and compare each shade sample with the truck paint through a hole (J).
- Next, you need to blend the color as suggested by the identification number on the color sample. Longacre looked up the formula in his computer and then used his scale to add the required weight of each component of the blend (K).
- You may need to blend as many as eight components. Shaking the vial hard for some time, Longacre said, “It needs to be shaken, not stirred, like a James Bond martini.” Then plug the vial into the bottom of the spray gun and spray it evenly onto a sample card. Next, dry it with a small, electrical air dryer (because the appearance will change during drying), and finally, compare the sample card you’ve made with the truck finish (L). The spray gun’s nozzle needs to be cleaned out right after by running a little solvent (put in a separate vial) through it each time so the paint won’t dry and clog the nozzle.
- The process can be like fitting shoes. Longacre found that following the formula for the samples that seemed to match produced paint a tiny bit too brown. After he went toward more black shades, the color was too light. He finally chose a color patch that appeared to be a little darker than the truck finish, and that produced a good match.
- Once Longacre had a vial full of paint that matched, the actual business of applying the paint was relatively simple. He guided the spray gun at a uniform speed back and forth over all the areas until an even coating had appeared (M).
- Longacre cleaned out the spray gun and vials, and blended a clear coat while the pigmented (or colored) coat of paint began to set. He then donned a mask – clear coat is more volatile and can damage the painter’s lungs without one – and finally repeated the process to add a clear coat over all the areas he had painted, providing protection for the pigmented layer. It also gives the paint its shiny, glossy look (N).
- The last step is to remove the masking (O). If the paint runs, it may be necessary to buff the finish to smooth it out. This cannot occur until the finish is dry, but that may only take an hour in summertime temperatures.
- The finished product looked like new – no more chips in the paint surrounding the headlights. The paint on the side fairing also looked completely intact and properly matched to the areas around it (P, Q).
For more information:
Best Used Trucks
(717) 933-9792
www.besttrucksofpa.net
Eric Longacre
(610) 413-7756
Sikkens, div. of Akzo Nobel
(800) 618-1010
https://www.sikkens.net/
DuPont Performance Coatings
(800) 338-7668
www.performancecoatings.dupont.com
PPG Industries
(412) 434-3131
www.ppg.com