Even with a disposable camera, you can take better pictures of your truck if you follow a few guidelines.
You may think that professional photos look better because of the equipment behind the photograph. While good equipment helps, the ultimate difference is the eye behind the camera and smart use of even basic equipment. Even with a disposable camera, you can take better pictures of your truck if you follow a few guidelines.
ALL CAMERAS
SHOOT AT THE RIGHT TIME OF DAY. The best time to take photos is before 10 a.m. and after 2 p.m. The mid-day sun is simply too bright and harsh. If you must shoot during those times, try having the subject in the shade.
WATCH THE BACKGROUND. Look for the least cluttered background. If you’re outside, the part of the sky opposite the sun is usually the bluest. If shooting people, make sure there are no background objects, such as telephone poles or lamps, that appear to be coming out of a person’s head.
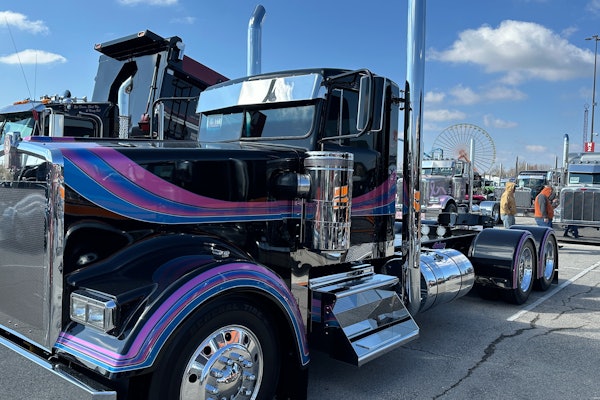
GET CLOSER. Though you might want to include everything into the picture, such as an entire truck and trailer and background, doing that often forces you to back up and lose too much detail, or to settle for a boring composition. Take a photo way back, but then move around and closer to the subject for other pictures. Take detail shots, such as filling the viewfinder with your train horns or bumper.
WATCH FOR YOURSELF IN PHOTOS. Make sure you can’t see yourself in a mirror or bumper, or in the foreground as a shadow. And no stray fingers in front of the lens!
GET THE RIGHT ANGLE. Changing your perspective can lead to dramatic results. Squat down and shoot up, or find a higher vantage point so you can shoot down. If you’re photographing people, make sure you have them at eye level, especially kids.
TURN THE CAMERA. If you’re shooting a tractor-trailer, it’s natural to hold your camera horizontally, but remember to turn your camera vertically when appropriate.
HOLD IT STEADY. Keeping your elbows tucked into your sides will help you keep the camera steady so you don’t have blurry pictures.
KNOW THE LIMITS OF YOUR FLASH. Most consumer-level flashes will not illuminate anything beyond 10 to 15 feet. If you’re in a large, dark area, such as a parking lot at night, don’t expect to light a truck from the grill to the back of the trailer.
USE THE FLASH TO FILL SHADOWS. On sunny days, the flash can fill in dark shadows, especially if there is lots of sky or sun behind the subject. Without the flash, you’ll get a silhouette. You might try taking one shot with the flash and one without. If the surface of what you’re shooting is reflective, such as the side of a cab or a pane of glass, shoot at an angle or you’ll get a big white spot where the flash is reflected.
LOOK AT PROFESSIONAL PHOTOS. The best way to get ideas is to study good photos. Try to figure how you can take a similar picture.
POINT-AND-SHOOT (FILM AND DIGITAL)
LEARN ALL THE SETTINGS. Many people learn the simplest automatic settings but ignore other shooting options. Read the manual and learn what all the buttons and dials do. Many point-and-shoots have special settings for close-ups, pictures of people or other common photos.
KNOW HOW TO FOCUS. Everyone has taken pictures of an unfocused subject. On most point-and-shoot cameras, you can press the shutter button halfway down for it to autofocus, usually on whatever is in the center. If a person in the foreground is off center, point the camera at the person and hold down the button. Keeping the button halfway down, reposition the camera to compose the shot you want and press the button the rest of the way.
HEED RULES OF COMPOSITION. There are certain sweet spots in a photo. Dead center is generally not the best place for your subject. Imagine a tick-tack-toe grid in your viewfinder. Now place your subject at one of the four intersections of lines. The same rule applies when shooting a landscape: Keep the horizon above or below the middle of the frame. Also pay attention to any leading lines, such as railroad tracks or pavement parking lines that lead the eye to or away from the subject.
CHOOSE THE RIGHT RESOLUTION OR FILM SPEED. You may think it’s better to shoot at your digital camera’s low-resolution setting so you can get more photos, but if you get a great photo, you won’t be able to enlarge it. If you always shoot at the highest resolution, you don’t have to worry, though you may need to invest in a larger memory card than the one that came with your camera so you can take more pictures. If you’re using film, most of the time it’s OK to use 200-speed or lower. If you try to blow up a picture taken with 400 or higher speed, the results look grainy.
UNDERSTAND WHITE BALANCE. Different lights give off different colors that the eye can’t see but the camera can. Most digital cameras allow you to change the white balance for sunlight, fluorescent light, etc. This reduces the chance of a photo having a weird tint.
SINGLE LENS REFLEX (FILM AND DIGITAL)
LEARN THE BASICS OF SHUTTER SPEED. If you want a crisp action shot – say, a truck driving down the highway – choose a fast shutter speed, at least 1/125th of a second. For a more artsy action shot, you may want to choose a slow shutter speed so the subject’s motion stands out. You should mount the camera on a tripod to get the best results.
LEARN THE BASICS OF APERTURE. The aperture setting, or f-stop, determines how much light gets through the lens. It also affects depth of field – the range of what appears in focus. A low number, such as 2.8, lets in a lot of light and can blur out a lot of the foreground and background. A high number, such as 22, lets in little light but allows everything to be in focus. Use this setting, for example, when you want to shoot your truck with mountains in the background and everything in focus.
TRY THE MANUAL SETTING. Cameras nowadays usually come with not only fully automatic exposure setting, but also aperture-priority settings and shutter-priority settings. With aperture-priority, for example, you determine the aperture and the shutter adjusts automatically. Most cameras also have a manual setting that lets you adjust both aperture and shutter speed. Go manual occasionally. You’ll learn a lot very quickly from mistakes, and it won’t cost anything when using a digital camera.
UNDERSTAND THE LIGHT METER. If you’re reading the meter, note where you focus it. If you focus on the dark part of a black truck, the rest of the picture will be too bright. If you focus on a sunlit spot of chrome, the rest of the picture may turn out too dark. If the sun is behind your subject, and you don’t use a flash to fill in the shadows, you’ll end up with a dark silhouette.
STEADY THE CAMERA WITH A TRIPOD. Your images will be sharper, and you will be able to experiment with longer shutter speeds for low-light situations. Using a tripod and a camera’s self-timer allows you to be in a family photo instead of behind the camera.
TAKE CARE OF YOUR CAMERA. Dust and moisture are great enemies of your camera. Every time you change lenses or put your camera in a camera bag, dust will find its way into your camera and ultimately into your pictures. Carry the camera and lenses in a clean bag and make sure the cover is closed.
INVEST IN EQUIPMENT. You don’t have to spend thousands of dollars to have a decent assortment of lenses, lights and flashes.
