Replacing linings – and more
All the parts of the brake system wear, so replace all working parts, not just the linings. Failure to do this will mean short life for the new brakes, and therefore problems with stopping and a higher chance of getting citations.
1. Get a service manual from the manufacturer. Procedures vary with the brand of brake and wheel position.
2. Buy quality parts, including a rebuild kit of small parts for the brand and type of brakes. It’s best to purchase linings from the truck manufacturer or from the company that made them for the manufacturer. Don’t use aftermarket linings unless the manufacturer can prove identical performance. If a lining is ruined by a leaky seal, replace the seal and renew the brakes on both ends of that axle.
3. Linings must be properly mounted on new or re-conditioned shoes. Used shoes are distorted and need to be “coined,” or straightened, so the new linings will contact the drum uniformly. Shoes must be flat and free of rust spots, which crack the linings, and should be coated to prevent corrosion.
4. Support the vehicle securely and release parking brakes. Disconnect each slack adjuster from its brake chamber by removing the clevis pin per manufacturer’s instructions. Remove the wheels and pull off the brake drums.

5. Inspect the drums for “heat checking,” which creates small nicks, and blue discoloration, and any groove worn into the surface by the linings, as well as overall wear. Damage can be machined out, but the drum must be thick enough even after machining for heat absorption, or the linings won’t fit the drum evenly. The wear/machining limit is stamped on the drum. If the limit is exceeded, the drum must be replaced. New drums are better, and some manufacturers forbid machining.
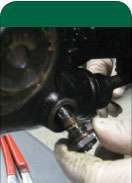
 Inspect the camshaft bearing journal.
 Install a dial indicator so the stem rests on top of the camshaft, with the dial at zero, prior to measuring clearance.
6. If there is play between the camshaft and its bushings because of imperfect maintenance, the new shoes will wear prematurely. Also, if there is grease on the linings, the seals have failed, likely because of bushing wear. (It’s okay to see a little grease on the slack adjuster end, but not near the cam.) Force the camshaft up and down and measure the play with a dial indicator to see how it compares with the manufacturer’s specs. The limit for Bendix brakes is 0.035 in. If you can feel any play, it is probably worn. Also check for axial play – in and out – which for the same brand is 0.020 in. Worn bushings are the most common cause of seal leakage, so replace both the bushings and seals, using brass rather than nylon bushings. Washers can be used to correct axial play. Make sure the camshaft journals are smooth and they and the cams show minimal wear, or replace the camshaft.
7. Inspect the spider for cracks or bending. This is the support for the shoes at the end away from the camshaft, where the anchor pins are.
 Note the positions of all parts before disassembly.
 As you reassemble the brakes, grease all wear surfaces, but not so much that grease will spill onto linings.
8. Make sure the shoes fit snugly, without play, onto the anchor pins. The anchor pins are the pivot point for the shoes at the end opposite the camshaft and rollers. Some are permanent. If replaceable, put in new ones.
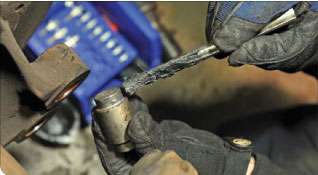 Grease the wear surface where the end of the shoe bears on either end of the anchor pin.
9. Install the new or reconditioned shoes, replacing the two return springs, the two rollers, and the roller retainers, lightly greasing roller wear surfaces first. Replace all other parts in the kit even if they look good.
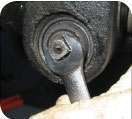 Adjust the slack adjuster manually to create proper stroke.
10. Once the drum and wheel have been re-installed, and attaching nuts torqued, adjust the slack manually. Turn the hex clockwise just till the linings touch the drum, and then back off the adjustment ¼ to ½ turn. Check the slack maker’s specification on back-off hex rotation, and follow any special requirements, such as the need to remove the pawl to adjust slacks made by Meritor.
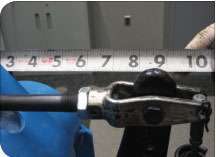 Measure the distance from the face of the brake chamber to the clevis both with brakes released and applied at 90 psi. Subtract the first dimension from the second to get stroke measurement.
11. Measure brake stroke at 90 psi application pressure, and make sure it conforms to CVSA standards for the size and type of chamber.
Thanks to Tom Runels, Kevin Pfost and Frank Butler of Bendix Spicer Foundation Brake and Kathy Rakowiecki of Meritor for their assistance.

