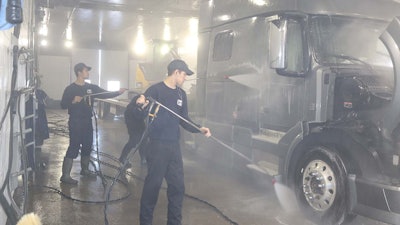
 Using hot water and reaching tight spots on the truck are critical to thoroughly removing road salts that may have set in from winter driving.
Left untended, the chemicals that eat away at snow and ice on the road can do the same thing to truck chassis, metal components and wiring.
One of the best corrosion inhibitors is simply keeping the truck clean, says Scott Colvin, PPG Commercial Transit brand manager. However, a typical exterior truck wash won’t remove corrosive chemicals and road salts stuck in the frame, junction boxes, couplers and other hard-to-reach areas.
Even when focused on those spots, a thorough removal of road salts isn’t as simple as just hosing off the rig with cool water.
“A combination of detergents and hot water is really what is needed,” says Jack Lennon, vice president of operations for Blue Beacon Truck Wash. Hot water does a better job of dissolving contaminants and surface salts.
Once the truck and trailer have been washed with detergent or neutralizer, it’s equally important that they are rinsed thoroughly. “Salt’s not the corrosive agent,” says Gerry Mead, executive director of innovation for Phillips. “When you add water and it breaks down, chlorine comes out of there, and that’s your corrosive agent of the salt.”
Oklahoma City-based Gemini Motor Transport washes its equipment at least on a weekly basis, says Jim Dillon, truck assets manager. “If they’re running through areas where these chemicals have been heavily applied on the highways, we’re going to wash them more often than that,” he says.

Optimal truck and trailer wash cycles vary, but Lennon advises paying attention to when salts and chemicals are no longer being applied to the road and having the unit cleaned thoroughly soon thereafter.
A high-pressure low-volume wash helps keep salt from clinging to metal parts, says Dave Latimer, a Pilot Flying J vice president. “The faster you can get any of the de-icing agents off the undercarriage of the truck or anywhere else there are metal parts, the better off you’re going to be in the long term,” Colvin adds.
Routine visual inspection for corrosion is an important preventive maintenance practice. Parts of the truck closest to the road are most susceptible to corrosion, making an inspection of the lower third of the unit vital. Damage should be addressed quickly, even something as seemingly mundane as a chip on a painted bumper.
“It doesn’t take much for a stone chip to crack through the paint down to the bare metal,” Colvin says. “Once the rust starts, it will creep underneath, blister the paint up and start deteriorating the steel surface.” In cases where component replacement isn’t necessary, affected bare-metal areas should be coated with primer and/or paint to keep rust from worsening, Colvin says.
Corrosion eventually will eat through any steel component and “make thin areas within the structure of the wheel,” Colvin says. “If you let it go long enough, it could be unsafe. There’re brake components, brake lines, any part of the chassis, or the air lines that are used to connect air brakes — all of that is susceptible to corrosion. If a line fails or some brake components fail, that could have bad results.”
In less severe cases, corrosion simply can add to downtime. “Corrosion on the wheel end of the truck can take a 20-minute change of a tire and turn it into 40 minutes to an hour,” Latimer says.
Visual inspections should include more than just scanning for rust, because corrosion also can deform metal. “It’s penetrating the metal, and a lot of times, it will look swollen,” he says. “You’re looking for anything abnormal.”
Dillon says Gemini drivers perform daily inspections for signs of rust, electrical corrosion and flaking metal before the equipment is handed over to technicians who perform similar inspections as part of their preventive maintenance cycle.
“They’re constantly looking for any signs of it when they’re doing their pre-trip and post-trip inspections,” he says. “They pay particularly close attention to the steering system, brakes, wheel ends, fifth-wheel assembly and electrical connections.”
Wiring is especially susceptible to corrosion. “Any time that you have a wire that gets penetrated – the plastic wrap around it gets impacted or cut – that really allows an opportunity for [corrosion] to start,” Latimer says. “Once it gets in there, it’s like a wick. It just spreads.”
A wiring checkup should be part of a pre-trip inspection. Latimer says plugs should be cleaned with a wire brush before connections are made. He says it’s also helpful to use dielectric grease on connection points.
Proper wire repair also is important, Mead says. “You can’t go around plugging in with a wire tester and poking it and breaking the jackets,” he says. “You have to have sealed butt connectors, trying not to have too many connectors.”
Another effective way to mitigate electrical corrosion is to use nylon components or fittings when possible.
“There’s a misconception that [nylon] is not as durable as metal, but that’s false,” Mead says. “All those can be sealed better so they’re not susceptible to corrosion.”


