Cut the hose at the damaged spot.
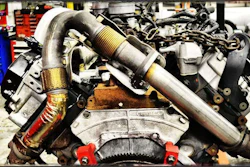
A ruptured hose can sideline a big truck on the spot. Replacement means either road service or the do-it-yourself option, which requires a full length of the proper size of hosing. Or you can try this quick fix, requiring only a piece of pipe, a few tools and minimal mechanical know-how.
A damaged hose, even if well repaired, is a citable DOT violation, so replace it as soon as possible.
- Cut the hose at the damaged spot.
- Slide one hose clamp over each cut end of the hose.
- Insert the pipe halfway into both ends of the hose.
- Securely clamp both ends of the hose to the pipe. Tighten as much as possible without damaging the clamps or hose.
- Start the truck to test the repair. If the hose is for high-pressure air, bring the system to full pressure. If it’s an air-brake hose, push hard on the brake pedal to make sure the repair holds at maximum pressure.
To inspect repairs in other hoses, run the engine for a few minutes while watching for leaks. The repair might not be fully tested until the engine is running at highway speed.Check your work. If it still leaks, apply the two remaining hose clamps just outside of the first two.
Your repair kit should include:
- A 3-in. to 6-in. length of pipe ($2). Make sure the pipe fits snugly inside the damaged hose, and make sure it’s galvanized steel. Brass or copper might react with hose fluids; hard plastic might melt, leak or collapse.
- Four hose clamps slightly larger in circumference than the hose ($1.50 each).
- A sharp knife or hacksaw to cut the hose. Steel- or fiberglass-reinforced, high-pressure hoses are hard to cut.
- A flathead screwdriver.