When asked why they’ve done a poor job of preventive maintenance, too many owner-operators say they were trying to save money. But there are many ways to save money on maintenance without skimping and courting disaster.
Stay on schedule. Plan your maintenance schedule as thoroughly as you plan this week’s haul and stick to it.
Shop around. Few owner-operators cite price as their primary factor in deciding where to buy their oil. They give more weight to convenience, but sometimes the cost of convenience can be high. Try to do a few price comparisons online or over the phone-- especially if you haven’t done so in years. Also look into the benefits of buying as part of a group or via a fleet, a membership organization or a truck stop or warehouse chain.
Take advantage of Rolling Stock tax exemptions. When available, save on parts/equipment purchases with the Rolling Stock sales tax exemptions for interstate trucking companies that exist in a variety of states. Ask every parts and service desk if this is available. Have your company’s MC# to enter in the tax exemption form at the point of purchase and sign the form. Each of the states where this is available will have its own specific tax forms that the business selling items is responsible for. Find a list of state exemptions current as of 2018 via this link.
[Related: Parasitic costs: 15 ways to eliminate and save, build value as an owner-operator]
Plan for emergencies. A front tire with a nail in it, multiple lights out because of a short circuit, or a suddenly failed brake lining might put even the most maintenance-savvy owner-operator out of commission -- or out of service, if a roadside inspector finds the problem first. The industry’s top truck, engine, tire and certain other manufacturers have created 24/7 help centers accessible via a toll-free number or proprietary smartphone app. These centers can put you in touch quickly with the nearest service outlet for emergency assistance.
Independent breakdown services offer similar assistance. Two widely used services are the FleetNet America and National Truck Protection service networks. The National Truck & Trailer Services Breakdown Directory is available to search for services in particular areas. Vetted service networks should help avoid predatory practices and billing when it comes to emergency roadside towing services, a significant hazard of over-the-road work.
Catch overlooked items early. Timely fixes to these problems can reduce thousands of dollars a year in operational costs by helping avoid breakdowns and providing better service to your customers.
- Charge air cooler. The CAC sits in front of the radiator and looks like a radiator. It is designed to cool superheated air from the turbo before it gets into the intake manifold for more efficient combustion. Seeing a water leak from a radiator is easy, but your CAC needs to be pressure-tested to find leaks. You can make or purchase a test kit, or have it done at any engine shop. Engine manufacturers differ as to how much CAC pressure loss is acceptable, usually 5 to 7 pounds in 15 seconds. But given the immediate drop in fuel mileage a leaky CAC causes, it makes sense to replace a unit that leaks just 2 pounds in 15 seconds. At that level, at 2,500 weekly miles at 6 mpg and $4.50 per gallon for diesel, you’d be losing $144 a week.
- Crankshaft damper. Some engine shops will tell you this doesn’t need to be replaced, but that’s often a mistake. The crankshaft damper, designed to reduce torsional twisting from the force of the connecting rods being driven down by combustion, wears out. Consequently, engine force and vibration are not transmitted throughout the entire frame and driveline. This leads to many problems, not the least of which is driver fatigue. Maintenance problems run the range of broken alternator brackets, broken air-conditioning brackets, clutch and driveline problems and even loose or faulty electrical connections. There is no way to inspect a crankshaft damper: Replacing it at 500,000 miles is recommended to avoid problems. It will cost around $1,000 or more.
- Flexible rubber fuel lines. These can deteriorate internally with no visible wear or damage. Internal deterioration can cause lines to swell and restrict fuel flow, triggering fuel-mileage declines and power loss. Trucks with fuel mileage issues can benefit from line replacement to the tune of 0.3 to 0.4 mpg. If your truck has more than 700,000 miles and an unexplained loss in mpg, it would be recommended.
- Factory mufflers. These can cause exhaust restrictions from day one. The longer they’re used, the more soot buildup you see in the muffler itself, and the more exhaust restriction is created. Restriction robs your engine of performance, power and mpg. You can install a high-performance flow-through muffler on most trucks for fairly nominal cost, and your return on investment is nearly immediate. You’ll also notice better throttle response.
- Shock absorbers. When shocks are worn, it can lead to excessive vibration, irregular tire wear and driver fatigue. Many experts recommend replacing shocks every time you replace tires.
- Wheel seals. Among all the parts that make up a wheel end, the seal is the weakest link in the chain. Engineers designed them that way, so that the seal fails before the other components, essentially, offering opportunities for owners to correct issues before catastrophe occurs. The worst that could happen? A wheel-off incident at highway speeds can be catastrophic for an owner’s career, particularly if it causes an injury or fatality accident.
The five most common reasons wheel seals fail:
- Bad installation, or a cocked seal not seated correctly. This could be the result of a mechanic not using the right tool or hitting it too hard and seating it in a crooked position.
- Incorrect bearing adjustment. There are many different systems with different specs, likewise preset hubs with different spacers and sealers. The bearing adjustment that may have guided you on a 2010 model truck’s steer position might be completely different on a 2011 steer. At a minimum, check bearing adjustment at regular PM schedules, and anytime the ABS light comes on. The simple bearing fluid oil/grease check might tell you a lot. Pull the rubber cap off the front of the hub cap and stick your finger a little into the oil. Pull it out and check for any metal particles that could be a sign of metal flaking, and bearings out of adjustment. Also smell the oil -- it should not smell burnt at all, and should be clean and filled to the correct level, visible through the view window on the front of the hub.
- A bad shoulder or hub bore, or other worn or damaged components.
- Contamination, or not cleaning properly, particularly an issue on trucks that spend time off-road.
- Clogged hub cap vent hole or drive vent. Both need to remain unclogged. If not breathing properly, pressure builds up and can blow out the seal.
Buy oil in bulk. The do-it-yourself oil change is a standard for many owner-operators, especially those with their own authority. A one-truck operator can save $200 or more a year by moving from gallon jugs to 55-gallon drums for oil purchases, assuming 125,000 miles per year with an oil change every 25,000 miles.
A 10-truck fleet can save almost $3,000 a year by changing from gallon jugs to bulk delivery in a tank. A first step in determining whether buying bulk oil makes sense for you is to contact a local distributor and explore pricing. Disposal is normally an associated cost, but if you live near an oil-recycling refinery, you might be able to sell your waste oil. Some small fleet shops use waste oil to heat their facilities.
[Related: Minding the pennies, stacking up dollars in profits: LNL Trucking]
Lights and reflectors: Keep them shining brightly
Flickering or dim lights usually are pre-failure symptoms that can be caused by improper bulbs, damaged wiring or corroded sockets.
A dim or flickering LED light is even more likely than an incandescent to indicate a problem beyond the light itself -- most often corrosion. Corrosion prevention starts by sealing connections properly when the light is installed. Grease also can prevent further corrosion damage. It also helps to remove any wire probes or picks used by technicians to penetrate the wire to measure voltage or continuity.
[Related: Following the rules of the road, and how they follow you: Inspections, violations, safety scores]
Looking at incandescent lighting vs. LEDs, LEDs cost more but offer significant advantages. A red incandescent lamp has a rated life of 5,000 hours, while a red LED lamp has a rated life of 100,000 hours. LED technology also is resistant to mechanical damage, shock and vibration.
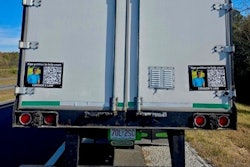
To prevent violations related to lighting, don’t overlook reflectors and conspicuity tape. These are required on most trailers to be equipped on the sides and rear with a means of making them more visible. Drivers can receive violations for having defective reflectors and conspicuity tape and should make sure reflectors are free of cracks and dirt. Conspicuity tape also can degrade over time to the point where it no longer is reflective, making that driver a sitting duck for a lighting violation or, worse, an accident.
Doing it yourself
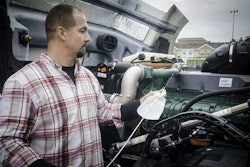
While your free time is valuable, every maintenance job you can do yourself is a job you don’t have to pay someone else to do. Common do-it-yourself jobs include fluid and filter changes, as well as routine work on relatively simple components such as wipers, lights, belts and hoses.
The basic rules always apply:
- Get expert advice for any new project, and be sure you aren’t violating warranties.
- If you’re not comfortable doing a job, take it to the shop.
Here are some cost breakdowns for a few common jobs. While parts prices are likely higher than they used to be on some of these jobs to do them yourself, so is the cost of labor at shops.
Greasing. Greasing is simple and inexpensive. You can purchase a high-quality lever-action grease gun, grease and wipes for less than $50. Your cost for each job: About $10. Shop cost: $50 to $75 or more, but usually included in an oil change. Time: 45 minutes.
Changing fuel filters. This doesn’t require many tools, but learning the proper technique is important, so consult your owner’s manual. You’ll need a band clamp of the appropriate diameter for fuel filters, a catch pan and a small container of fuel. Your cost: $20 per job. Shop cost: $40 to $50 or more. Time: 30 minutes.
Cleaning connections and cables. Special battery terminal cleaners are inexpensive, and other connections can be cleaned with sandpaper or steel wool. Your cost: $10 per job. Shop cost: $80 to $100 in years past, well more these days, for an hour of shop time.
Inspecting cooling system. To check your system, buy test strips and measure antifreeze concentration and the level of anticorrosion additives. Your cost: About 20 cents per test for one test strip. Shop cost: $20. Time: 15 min.
To help keep shop costs in check, and maybe keep your rig off a tow hook, think about taking the following tools on the road and keeping them in the truck:
- A set of eight hand wrenches and sockets
- Two standard adjustable crescent wrenches, one 6 inches and one 10 or 12 inches
- A fuel-filter wrench
- Two vise grips, one 6 inches and one 8 inches
- A hacksaw with spare blades
- A carpenter’s hammer
- A ball-peen hammer
- A 30-inch crowbar or pry bar
- A set of flathead, Phillips and star-tip screwdrivers in various sizes
- Rolls of duct tape and electrical tape
- A can of WD-40 or some other spray lubricant -- don’t lose the straw.
- A knife
- Wire and metal snips
- An electrical current tester
- C-clamps
- An air-pressure gauge
- An awl
- Pliers of various sizes
- Flashlights of various sizes, including one for your pocket, one for flagging help and a large
- free-standing lamp for night repairs
- Jumper cables, at least 20 feet long
- Towing chains, 20 feet of 20,000-pound strength
- A torque wrench
- A handheld remote diagnostics unit that communicates with the truck’s onboard computer, or in the case of newer-model trucks, mobile-device/laptop software capable of interpreting ECM fault codes for maintenance troubleshooting.
Draw on the wealth of maintenance coverage featured in Overdrive. A list of how-to articles as well as other stories, with links to the archived stories, is available here. Also check out Overdrive’s “Highway Hacks” series for tips on DIY fixes and innovations.
Read next: Aftertreatment demons: Keep your diesel emissions system clean to prolong life
